Good method for installing WordPress Upgrades
I have multiple WordPress blog sites and use Linux hosting. The website uses WordPress and MySQL. Here are the steps I use for the updating WordPress.
- Log into the WordPress website as an administrator account. You will notice on the Dashboard there are updates (Figure 1).
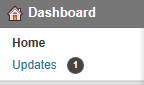
Figure 1
- If you click on Updates it will tell you what is being updated, in this case it is an update to version 3.5.1.
- Log into the hosting account.
- Launch the website hosting account.
- Go to the My Applications section to see if the update is ready. Give the hosting company a few days to obtain the update after you first see it in the WordPress Dashboard.
- Once you have established the update is ready to be installed by the hosting company go to the File and FTP -> File Manager (Figure 2).
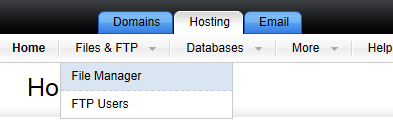
Figure 2
- Under File Manager click Create New Directory.
- Call the directory something like (domain name)_wp_(version number), like thefrugaltech_wp_3_5_0.
- Next select the directory you want to back up (Figure 3).
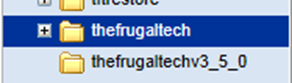
Figure 3
- Click on the check mark next to Filename to select all the directories and files (Figure 4).
- Click Copy at the top and select the directory just created to paste the files and click OK. The files will copy to that directory.
- Now you have a copy of the files in case something goes wrong with the upgrade.
- You should be logged into the WordPress blog site as administrator. Click on Plugins. You can update any plugins that require updating; however for the WordPress version upgrade you will need to deactivate all the plugins. This is done so you can get back into the WordPress blog site after the upgrade without interference from a plugin that is not compatible with the new version. Write down the plugins you deactivate so you activate the correct plugins once the upgrade is complete.
- Once the plugins have been deactivated, log out of the WordPress blog site.
- Go back into the hosting site, because we are going to manually back up the database.
- In the Control Panel go to Hosting -> Databases -> MySQL (Figure 5).
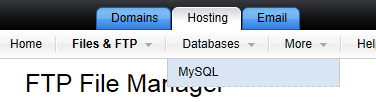
Figure 5
- Find the database for your WordPress blog site. If you cannot find the database it is listed in the wp-config.php file next to DB_NAME.
- Click Actions and select Back up.
- The hosting company already has a backup location set. Many times the location is _db_backups. Click OK to perform the backup.
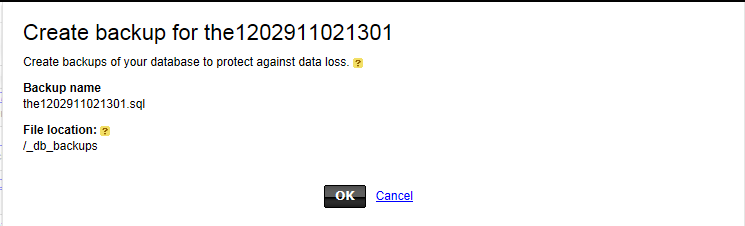
Figure 6
- The backup will run and the MySQL screen will show the backup is pending (Figure 7). Be patient, because you do not want to move on until you have a good copy of the database.

Figure 7
- Once the backup is complete press Close.
- Open Files & FTP -> File Manager -> _db_backups. Find the files for the backup and rename them with the version number (Figure 8).

Figure 8
- In the Control Panel go to Hosting -> Databases -> MySQL (Figure 5).
- Now that the WordPress directories and files and the database are backed up and the plugins disabled it is time to start the upgrade.
- Go to the My Applications section and select the Updates Required! link (Figure 9).
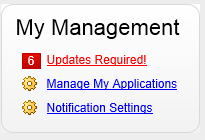
Figure 9
- Find your WordPress blog site and click Update Now (Figure 10)

Figure 10
- Click Install Now Click Update Version Number only if there is something in the update that might break the WordPress Blog site.
- The next screen is the patch install screen. I have found the database backup does not work because the backup has the same name the first backup and the installer does not have the permissions to overwrite files on your website. Hence the reason for doing the manual backup. Select Next (Figure 11).
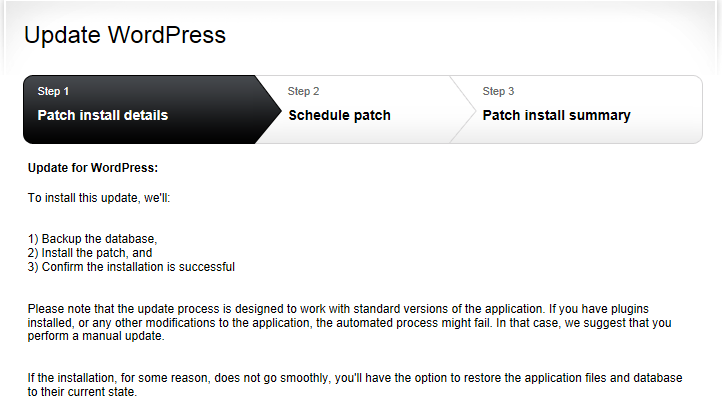
Figure 11
- The next screen is the patch schedule. Unless you have a lot of visitors on the website you might want to just keep the default time and press Next (Figure 12).
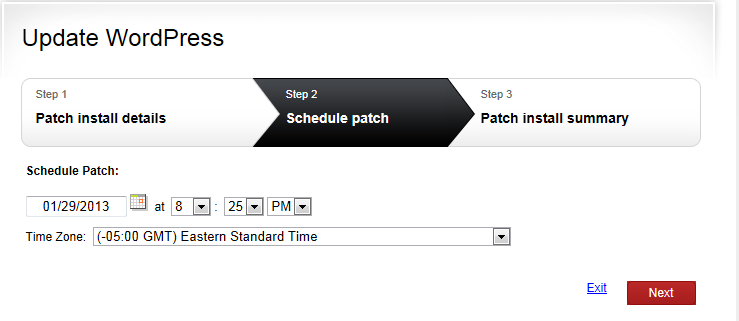
Figure 12
- The patch install summary just tells you when the patch will be installed. You need to know the information so you can log back in and activate the plugins deactivated earlier (Figure 13).
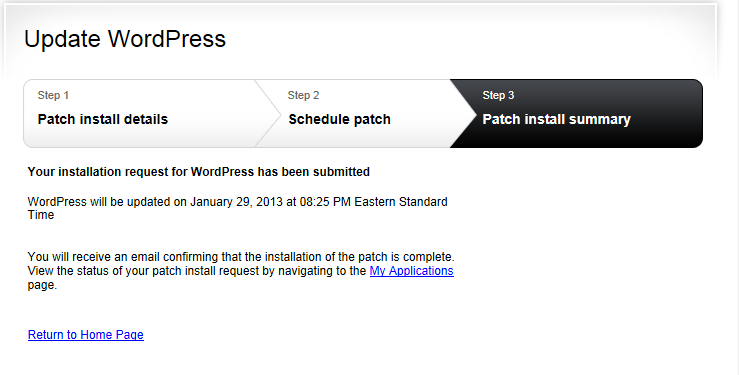
Figure 13
- Log out of the hosting plan. Some hosting plans will send email when the update is complete. You want to give the update about 30 – 45 minutes before checking the WordPress blog site.
- 45 minutes later I was able to log into the WordPress blog site and activate the plugins.
Rarely do subversion upgrades have issue. The issues arise when jumping between versions, but you should be set now because you know the best method for updating WordPress.
Enjoy!
